New RCM Loader ONE Teardown
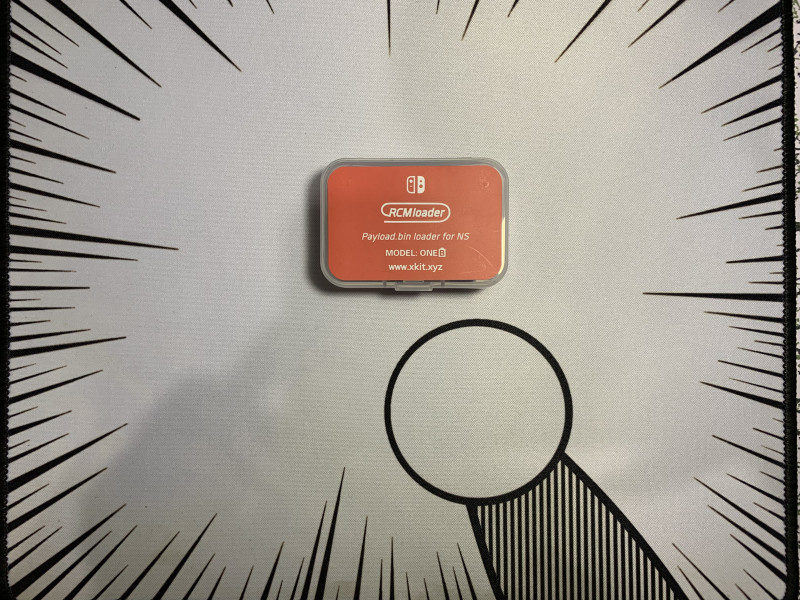
Today the new RCM Loader Model ONE(B) arrived at ABXGAME. It is a new model with nicest case i have ever seen.
- 1pcs via Aliexpress: http://bit.ly/2Upu8GE
- Wholesale order, Please contact us directly.
Features:
- Compatible with every SWITCH console released before June 2018.
- Support for payload.bin injection file.
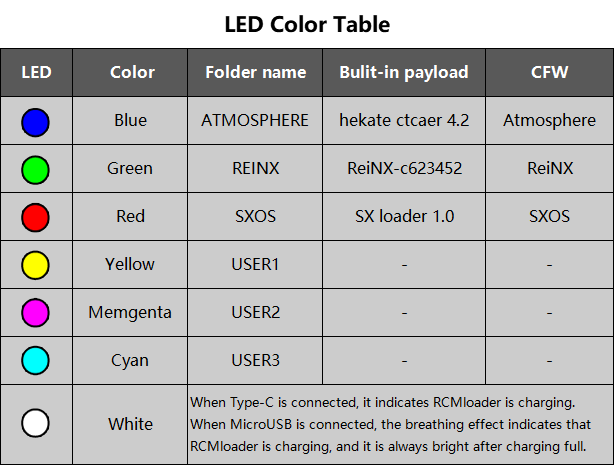
- Built-in Atmosphere, ReiNX and SXOS payload files, one-button changing payload.
- Built-in Li-on battery, 1000 times inject with 1 hour charging time.
- Easy to manage, connect to a computer or mobile phone automatically recognized as a USB flash drive. (Drag-and-drop payload.bin)
- Excellent compatibility for Windows, macOS, Linux and Android operating system.
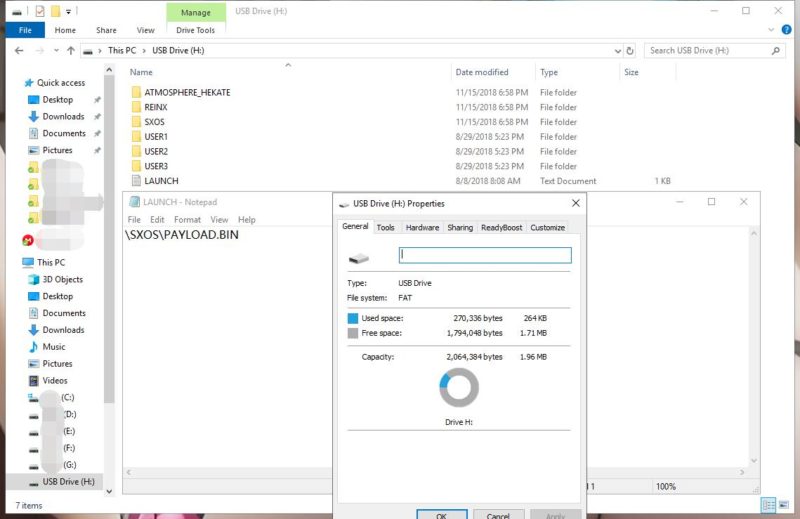
payload files (Atmosphere, ReiNX and SXOS) are inside. You can drag-and-drop payload.bin easily.
Compatibility:
- Compatible with every SWITCH console released before June 2018
- Compatible with Windows / Mac OS / Linux / Android systems
Battery
- Built-in Li-on battery (45mAh)
- 1000 times inject with 1 hour charging time
- 3 months standby time
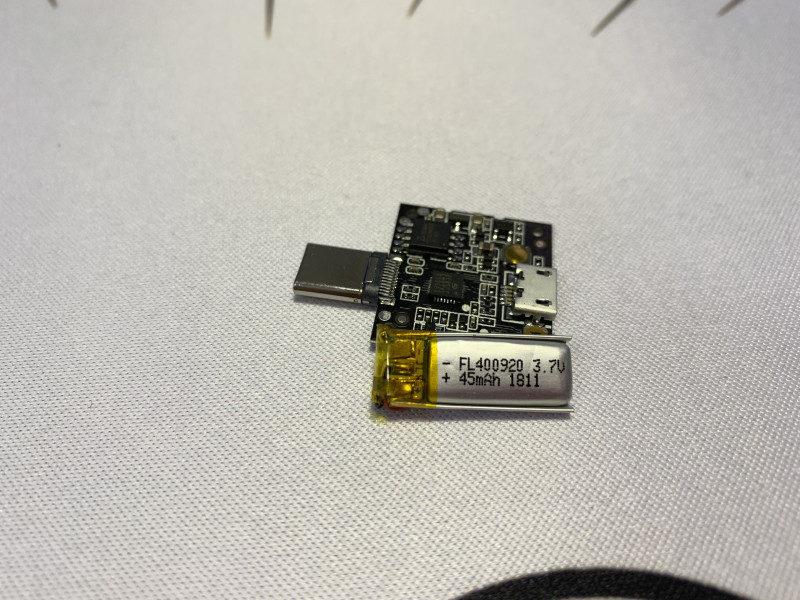
Chips
- F350G8 CK68H3 JJ1832 (GD32F350 Series (Value) – GD32 ARM Cortex-M4 Microcontrollers)
- CB1809 25VQ16ASEG PP7463
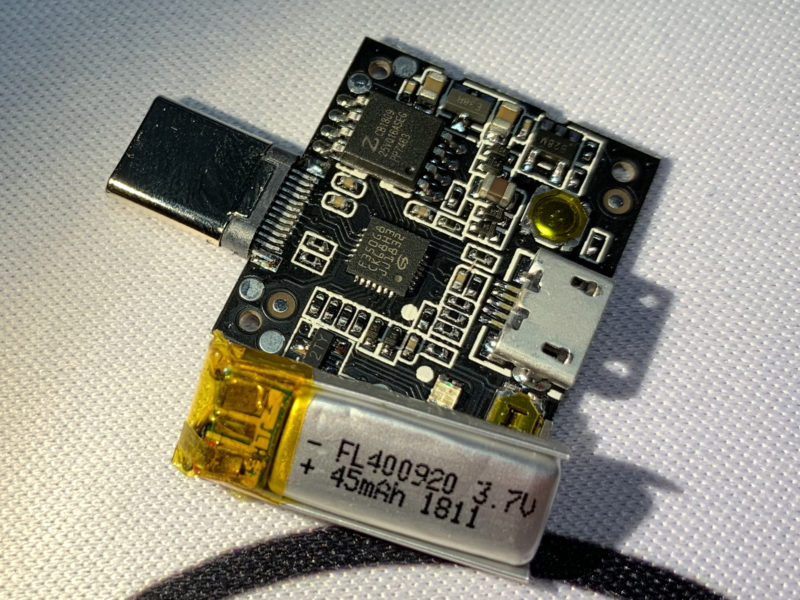
Ports and IOs
- Micro-USB Port
- Type-C port
- RGB LED
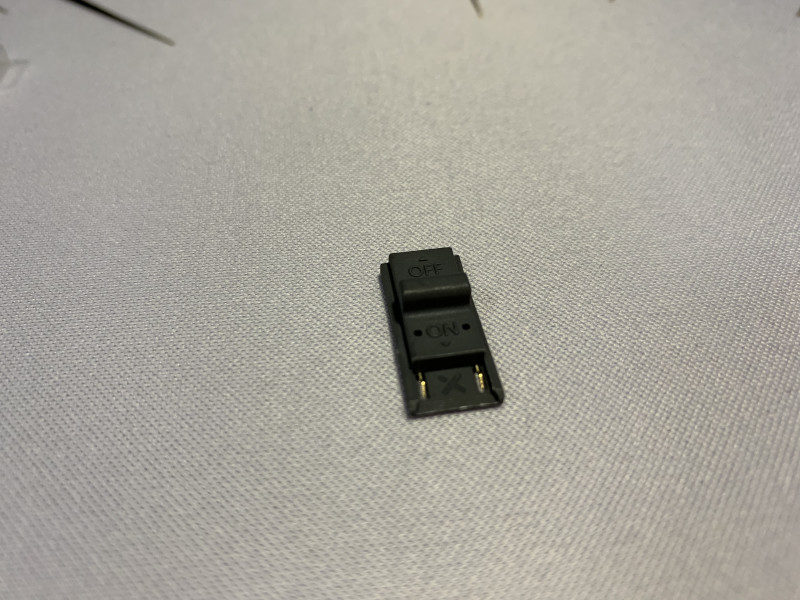
- Function button
- RESET port
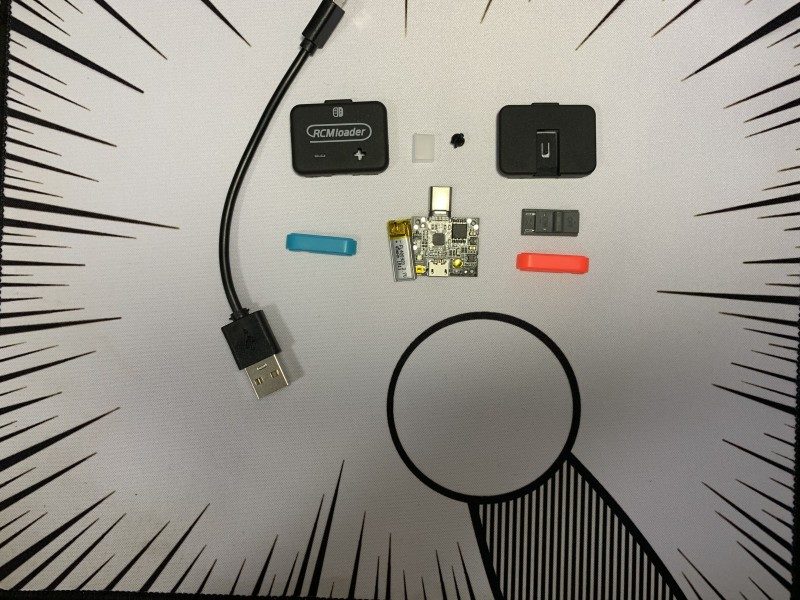
Includes
- RCMloader Model ONE B
- RCMclip
- Micro USB Cable

Basic Usage:
How to show current payload:
Click the button + to show the current payload (LED flash twice).
How to change build-in payload :
Hold the button + to jump to the next payload (LED flash 4 times).
Low battery prompt:
When the battery is low, the LED will flash red and green after the button + is pressed.
Replace/update the payload steps:
1 Connect RCM loader to the computer by Micro USB cable.
2 After the computer automatically recognizes the RCM loader as a USB flash disk, copy the payload.bin file to the corresponding folder to replace the payload.
* The payload file MUST rename as payload.bin
Firmware v1.1 change log:
- Fixed the LED not off when injection fail problem.
- Enhanced the stability of the injecting.
Firmware update instruction
1.Download the firmware file first from here
2.Unzip the firmware file.
3.Connect the RC loader one to your Computer via the Micro USB cable.
4.Copy the IAP folder to the root of USB drive.The file like this, USB DRIVE:\IAP\FIRMWARE.BIN.
5.Unplug the Micro USB cable.
6.Plug the Micro USB cable again, the RCM loader will auto upgrade in 3 seconds, then the IAP folder in USB DRIVE should be auto deleted.